参考《Qt5 C++ GUI Programming CookBook - Second Edition》中的《Chapter 5, OpenGL Implementation —— Setting up OpenGL in Qt》
在 Qt 中设置OpenGL
新建一个 Qt Widget 应用后需要在工程文件(.pro)中的 QT += core gui 后面添加 opengl即:
之后添加库依赖:
1
| LIBS += -lopengl32 -lglu32
|
若缺少这两个库,程序将无法运行。
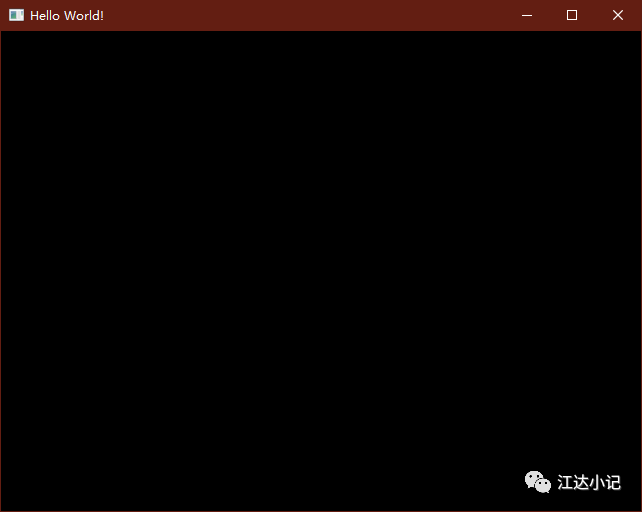
接下来写一个 Qt 下最简单的 OpenGL 程序,该程序只是显示了一个黑色窗口,可以用来测试配置是否成功。
首先删去自动生成的 mainwindow.ui, mainwindow.h, mainwindow.cpp,这里只需要 main.cpp.
添加 QtOpenGL 头文件以使用 QOpenGLWindow 类,用 QOpenGLWindow 类来代替 QMainWindow,QOpenGLWindow 更加适用于实现 OpenGL 渲染,性能更强。
1
2
3
4
5
6
7
8
9
10
11
12
13
| #include <QtOpenGL>
#include <QApplication>
int main(int argc, char *argv[])
{
QApplication a(argc, argv);
QOpenGLWindow w;
w.setTitle("Hello World!");
w.resize(640,480);
w.show();
return a.exec();
}
|
程序执行效果图:

Hello World!
接下来可以开始写 OpenGL 的 Hello World! 程序了,画一个三角形。
参考《Qt5 C++ GUI Programming CookBook - Second Edition》中的《Chapter 5, OpenGL Implementation —— Hello World!》
代码下载:https://github.com/PacktPublishing/Qt5-CPP-GUI-Programming-Cookbook-Second-Edition/tree/master/Chapter05/Setup OpenGL
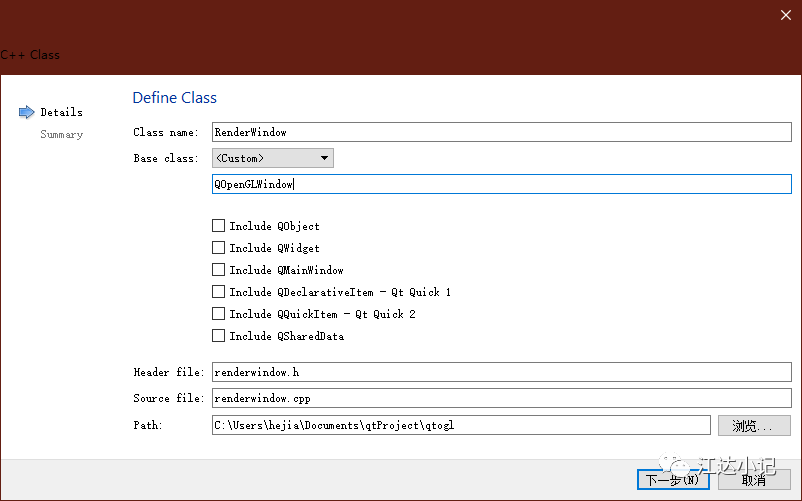
在这里我们要新建一个继承于 QOpenGLWindow 类的 RenderWindow 类:

在 renderwindow.h 中添加需要的头文件:
1
2
3
4
5
6
7
8
9
| #include <GL/glu.h>
#include <QtOpenGL>
#include <QSurfaceFormat>
#include <QOpenGLFunctions>
#include <QOpenGLWindow>
#include <QOpenGLBuffer>
#include <QOpenGLVertexArrayObject>
#include <QOpenGLShader>
#include <QOpenGLShaderProgram>
|
RenderWindow 类:
1
2
3
4
5
6
7
8
9
10
11
12
13
14
15
16
17
18
19
20
| class RenderWindow : public QOpenGLWindow
{
public:
RenderWindow();
protected:
void initializeGL();
void paintEvent(QPaintEvent *event);
void resizeEvent(QResizeEvent *event);
private:
QOpenGLContext* openGLContext;
QOpenGLFunctions* openGLFunctions;
QOpenGLShaderProgram* shaderProgram;
QOpenGLVertexArrayObject* vao;
QOpenGLBuffer* vbo_vertices;
};
|
在 renderwindow.cpp 文件中:
1
2
3
4
5
6
7
8
9
10
11
12
13
14
15
16
| RenderWindow::RenderWindow()
{
setSurfaceType(QWindow::OpenGLSurface);
QSurfaceFormat format;
format.setProfile(QSurfaceFormat::CoreProfile);
format.setVersion(3,2);
setFormat(format);
openGLContext = new QOpenGLContext();
openGLContext->setFormat(format);
openGLContext->create();
openGLContext->makeCurrent(this);
}
|
着色器:
1
2
3
4
5
6
7
8
9
10
11
12
13
14
15
16
17
18
19
20
21
22
23
24
25
26
27
28
29
30
31
32
33
34
35
36
37
38
39
40
41
42
43
44
| void RenderWindow::initializeGL()
{
openGLFunctions = openGLContext->functions();
static const char *vertexShaderSource =
"#version 330 core\n"
"layout(location = 0) in vec2 posAttr;"
"void main()"
"{"
" gl_Position = vec4(posAttr, 0.0, 1.0);"
"}";
static const char *fragmentShaderSource =
"#version 330 core\n"
"out vec4 col;"
"void main()"
"{"
" col = vec4(1.0, 0.0, 0.0, 1.0);"
"}";
shaderProgram = new QOpenGLShaderProgram(this);
shaderProgram->addShaderFromSourceCode(QOpenGLShader::Vertex,vertexShaderSource);
shaderProgram->addShaderFromSourceCode(QOpenGLShader::Fragment,fragmentShaderSource);
shaderProgram->link();
GLfloat vertices[] = {
-1.0f, -1.0f,
1.0f, -1.0f,
0.0f, 1.0f
};
vao = new QOpenGLVertexArrayObject();
vao->create();
vao->bind();
vbo_vertices = new QOpenGLBuffer(QOpenGLBuffer::VertexBuffer);
vbo_vertices->create();
vbo_vertices->setUsagePattern(QOpenGLBuffer::StaticDraw);
vbo_vertices->bind();
vbo_vertices->allocate(vertices,sizeof(vertices)*sizeof(GLfloat));
vao->release();
}
|
绘制三角形:
1
2
3
4
5
6
7
8
9
10
11
12
13
14
15
16
17
| void RenderWindow::paintEvent(QPaintEvent *event)
{
Q_UNUSED(event);
glViewport(0,0,width(),height());
glClearColor(0.39f,0.58f,0.93f,1.0f);
glClear(GL_COLOR_BUFFER_BIT);
vao->bind();
shaderProgram->bind();
shaderProgram->bindAttributeLocation("posAttr",0);
shaderProgram->enableAttributeArray(0);
shaderProgram->setAttributeBuffer(0,GL_FLOAT,0,2);
glDrawArrays(GL_TRIANGLES,0,3);
shaderProgram->release();
vao->release();
}
|
窗口变化时调整大小
1
2
3
4
5
6
| void RenderWindow::resizeEvent(QResizeEvent *event)
{
Q_UNUSED(event);
glViewport(0,0,this->width(),this->height());
this->update();
}
|
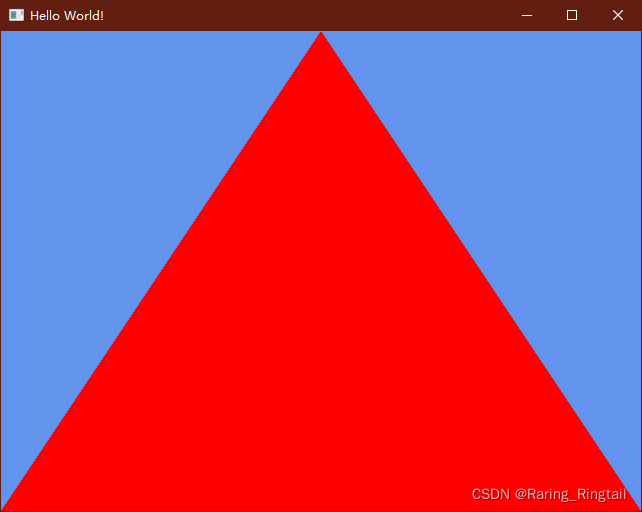
最后在 main.cpp 中把 #include <QtOpenGL> 换为 #include "renderwindow.h",把
QOpenGLWindow w; 换为 RenderWindow w; 运行即可得到下图效果:

欢迎关注我的微信公众号 江达小记


